

Make Your Own Asset Library
MipMap #038: You Already Made The Assets, Now Use Them!

Welcome back to MipMap! Hopefully everyone enjoyed the first edition of Wireframe, I know that I found it to be extremely cathartic just writing about the experience. Just as a reminder Wireframe will be a monthly edition (or every four weeks, whichever is easier), meaning it won’t be back until … Halloween? I guess that means I’ll have to cook up something especially spooky to match the occasion. Or maybe something “monstrous” to suit the occasion. Subscribe and stay tuned to find out!
In the meantime though, we are back on MipMap with another knowledge dive into the wonderful world of 3D art. I’m still coming off of the high of the Blender Basics series, so I’ll keep this edition in the same area. While we won’t be delving into whole sections of Blender or 3D art, this week we’ll be looking at a powerful tool that you create yourself. As you’ve probably guessed from the title, it’s Asset Libraries!
All Of The Assets, All At Once
 | Resources")
You might be familiar with the concept of “kitbashing”. The term gained popularity among model-enthusiasts for taking individual pieces of different model kits and combining them into something entirely new. Take two or more separate things and put them together. What do you get? Something completely new.
You can use the same concept in 3D art when it comes to assets you’ve already made or already have in your possession. A 3D model of a train is a 3D model of a train, regardless of whether you put it in a wild west-themed landscape, a post-apocalyptic wasteland, or a bustling train station. Even if you don’t like how it looks initially, you can just adjust it after the fact. This is a time saving measure, and saves you a significant amount of time and energy.
Maybe you already knew all of that and are even using some subscription libraries. Kitbash3D is probably the biggest provider, but there are other services just like it as well, like Quixel’s Megascans, Polyhaven, Textures.com, and probably several more that I haven’t listed. As you’ll note though, these are all provided libraries that you pull assets from. While I won’t say whether these are worth the money you pay for them (since it’s not my call whether they’re worth it for you), I can say that they are missing a fundamental aspect when it comes to helping you improve as a 3D artist.
They don’t allow you to track and manage your own assets.
Why Would I Want To Manage My Own Assets?

Because you want to improve your skills and tangibly look and assess where your 3D abilities are at.
The unfortunate reality with 3D art is that when you begin, you aren’t making absolutely gorgeous compositions and frame-worthy portraits. You’re producing blown out renders while you learn how to light, really wonky-looking movements as you figure out how to animate, and glaringly off-putting models when you start thinking that’s the best you can do. And these are fine, everyone produces these when they’re starting out.
My point is that your work will not look pretty when you begin. Looking at your portfolio full of early works can be a sore sight on the eyes, but it could potentially be even more harmful to your motivation. You’ll want to de-list them, or even delete them entirely, but then how do you measure how far you’ve come?
By literally dragging out your old work from the bowels of your project files and comparing them in the DCC you work in. It’s one thing to see visual improvement, it’s another to know how you’ve improved on a technical and fundamental level.
Now all of that is what I’ve come up with in the past two weeks, as that’s what I’ve told myself as I’ve begun the process of assembling a half-decade’s worth of Blender files. Hopefully you can see the merit in my reasoning though.
How To Organize Old Project Files
Blender has had user-created Asset Libraries as a feature in one form or another, but they’ve only really received the love and attention it needed back in the 3.0 release. Because of the way that .blend files are structured, each file has the ability to contain any number of individual objects, textures, meshes, animations, and much more. With this we can have one or more .blend files act as the Asset Library we want to make.
However, the .blend file isn’t completely ubiquitous. There are several limitations to it’s ability, most notably that data types outside of Blender’s immediate handling capabilities (like audio and image files) are not accessible in a Blender Asset Library. Keeping these limitations in mind, it’s worth noting that only meshes, worlds, geometry nodes, materials, rigs, and poses are able to be stored in Blender Asset Libraries.
Creating An Asset
Let’s start from the bottom and find our way up.
In order to create an Asset Library, you need an asset. Let’s use this model train car that I had lying around from an old project.
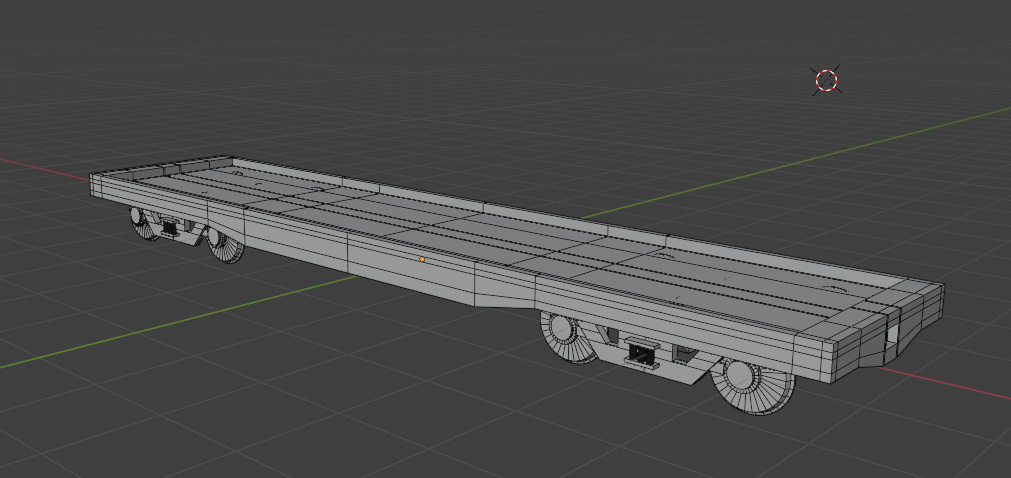
I want to create a whole Asset Library with this flatbed train car as it’s first component. Let’s not get ahead of ourselves though, first we need to make sure that Blender knows we want the flatbed car to be an Asset. What we do is simply right-click the object in the Outliner window and select “Mark as Asset”.
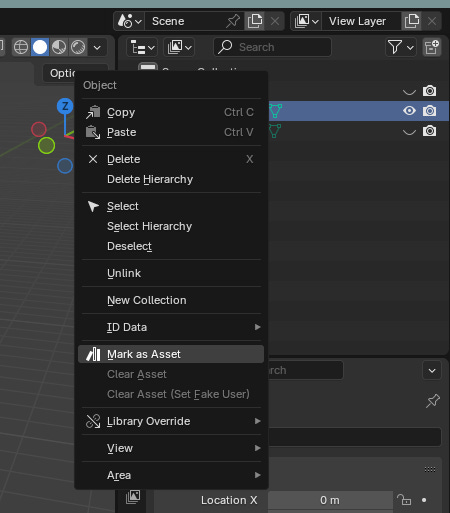
And you’ve created your first Asset. Congratulations, it is that easy.
However, just because we’ve told Blender that this object is an asset doesn’t mean that it’s now available to us in every project forever. The next step is setting up the folder / directory where Blender will know that all of the Assets are stored.
Creating An Asset Library
An Asset Library consists of three parts: the Asset, the Catalogue, and the Library itself. This is an organizational system where Assets are (optionally) sorted into Catalogues, which are all contained in a Library. Creating the Asset is as easy as shown above, but placing it correctly within both a Catalogue and a Library is a bit more involved.
The Library is a folder or directory on your computer that you will point Blender towards. This is done in the Preferences menu under the “File Paths” option.
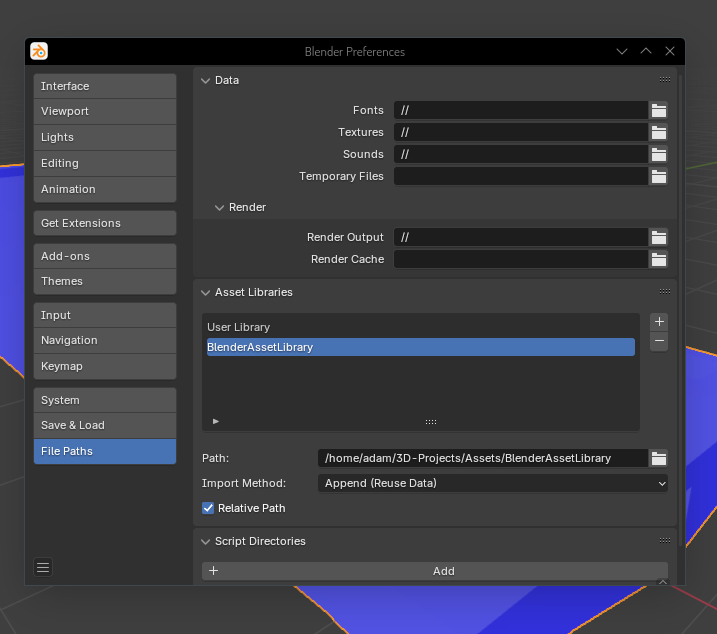
Note the import method, which will determine how your Assets are handled when you wish to use them in a new scene. Appending is importing the Asset directly into the scene, with the (Reuse Data) option letting each resource with multiple instances be reused instead of making it unique per instance. Linking simply tells Blender to look at the original file and use that data instead of making it local.
Two things to keep in mind. First, you aren’t able to edit the Asset and then put it back in the Library. For that you have to go back to the source file and make your edits. However, you are able to localize the object and edit it in the scene you’re currently in, but again, those changes won’t be saved for the Asset. Second, you can have multiple Libraries at different points in your file system, but be aware that it might get messy trying to keep track of things.
To interact with our Assets in all of our scenes, we use the Asset Browser window. This is done by clicking the drop-down menu in the top right of your window and selecting Asset Browser. If you haven’t created a Library you might not see anything, however Blender does come with several default Libraries to view. If you have created a Library and begun to throw in Assets, you might notice that things quickly get chaotic. Thankfully, Catalogs brings order and gives us a crucial intermediary layer to help us keep things organized.

Catalogs are a folder system that Blender uses to keep things organized. If the Library is the all-encompassing structure that houses everything, then Catalogs are the rooms within. Catalogs are not dependent on your computer’s file structure and exist purely within Blender. If you are a maniac and don’t care about keeping files organized in their own folders, you could theoretically put all of your Asset files in one folder / directory on your computer and let Blender handle all of the organization.
To create a Catalog all you have to do is either click on the little “+” icon on the top of the Asset Browser window, or right-click in the same window and select “New Catalog”. Once you’ve created an Asset, it’ll appear in the “Unassigned” section and all you have to do is drag and drop it in the newly created Catalog.
Outro
Those are the fundamentals of Blender’s Asset Library functionality. It’s a very simple system, but one that allows an unlimited amount of potential once you begin to build it out. While I didn’t show you a proper application, the process is very straight forward. Once you play around with it and see how it works, you’ll be able to configure a setup that works the best for you. Whether it’s a mesh, and object, a world environment, or a material, adding it into an Asset Library is a great way to both improve your workflow and easily assess how far you’ve come in your artistic journey.
If you’d like more information about Blender’s Asset Library, I’ve linked several resources down below, including a full video walkthrough in case my instructions weren’t clear.
Until next week, stay organized!
- Adam