


When I first started looking into 3D art, I was immediately taken by the large environments with hundreds or even thousands of assets that all seemed to be meticulously placed. Little did I know that more likely than not, every asset was fed into the game engine or digital content creator and then arranged using logic and parameters. While individual hands made every asset, placing them was the work of the machines (thankfully not the ones that were trained on our stolen artwork). I still lacked one key bit of information though: what was the logic that made everything work?
Unfortunately, the full answer to that question still eludes me, but I've managed to pick up some solid ideas as to how we go from basic barren terrain meshes to immersive living scenes. In this article I'll share those with you, but to give a brief overview beforehand, it looks something like this:
Step One: Utilize Principles
Procedural 3D scenes are not made by throwing in assets at random, they have an inherent logic that makes them work.
Step Two: Identify What Matters
Some assets will matter more than others, and we have to make sure the scene reflects this.
Step Three: Make It Seem Natural
This is where even hand-crafted scenes can fail. While nature isn't completely random, it also isn't completely uniform or structured either.
The Principles of Procedural Environments
Before we go hands on, it’s worth briefly going over what makes a good environment. It’s not the assets, or the degree of realism, or even a specific subject or topic. Those all help, but they’re more the decorations rather than the base. Good procedural 3D scenes effectively implement layering, hand placed details, and hero assets to build a scene that is then built out with the assets, art styles, and compositions to make it great.
Effective Layering
Layering is something that you might not think about if you’re new to 3D art, but it is a concept that is everywhere. The most straightforward example is to think about how much detail a model should have.
Assume we’re working in a standard PBR workflow. We want to make every item look like they would in real life, so we have to add every detail that would occur on the model’s real life counterpart. Metal gets rusty, wood rots, glass can be scratched and cracked, food gets moldy, buildings decay, etc. But would we painstakingly add all of those details into the physical topology of the model? No, of course not. We would start by blocking out the item to get the silhouette, then refine it down to get our base model, and then add in all of those small details with materials in the texturing process.
Already, we’ve used layering to our advantage. Now if we extrapolate that out to entire scenes, where we work with dozens, if not hundreds of assets, how does layering work there? Mostly the same, actually.
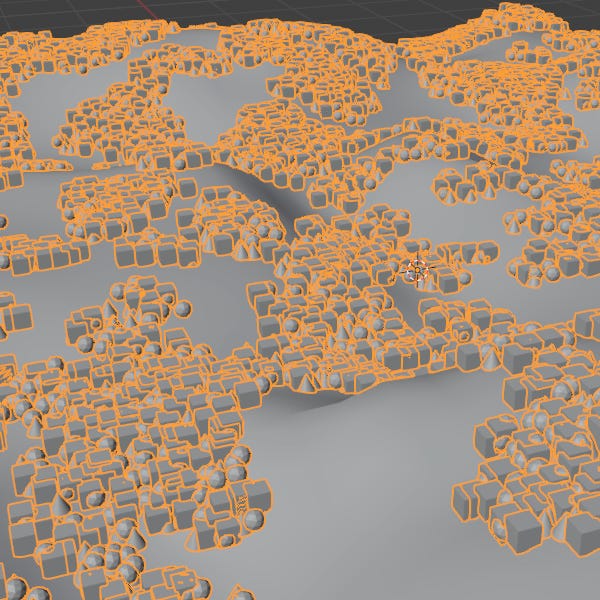
Let’s start with a base heightfield terrain, maybe the same one you built from the guide a couple weeks ago. We want to scatter assets across this, and maybe even make sure there’s room for a road or a river to cut through them. To scatter our assets across this heightfield, we can use this node setup:
All we’re doing so far is just scattering a bunch of points across the whole heightfield, but we can start to shape how our points are laid out.
Adjust As Needed
While simply instancing our assets on each point as they are might work for some environments, it doesn’t look so good when we’re instancing trees on top of mountains. Since realism is our goal, we have to look at the real deal to see how we need to adjust our node setup.
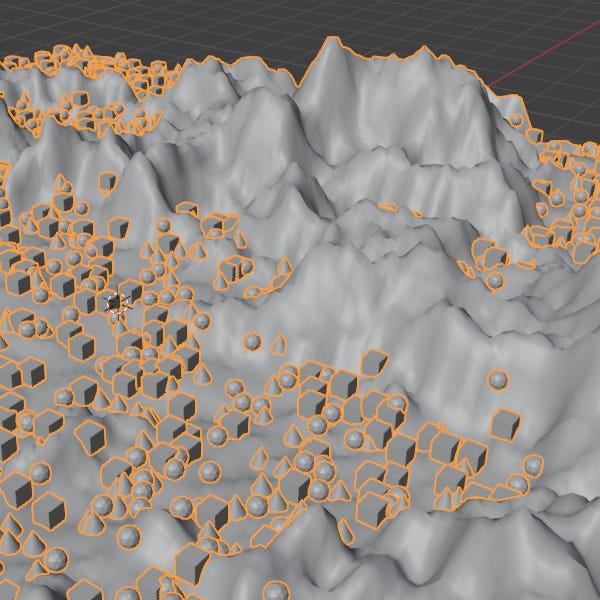
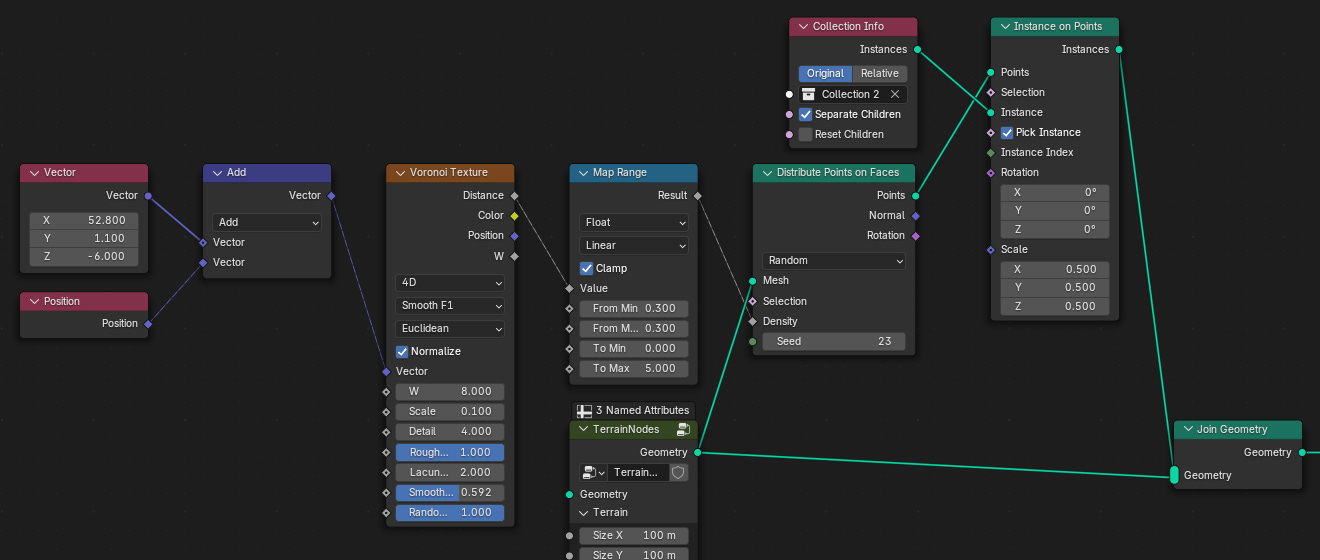
In nature, trees won’t grow past a certain line as you go up the mountain. This is handily referred to as the “tree line” since it’s the altitude where trees can’t get enough nutrients to grow. While the exact formula for determining a tree line is far from concrete, we won’t be looking at the specifics of how the science says it works. Instead, we’ll use a quick and dirty trick to both add a fake tree line and weave in another terrain profile.
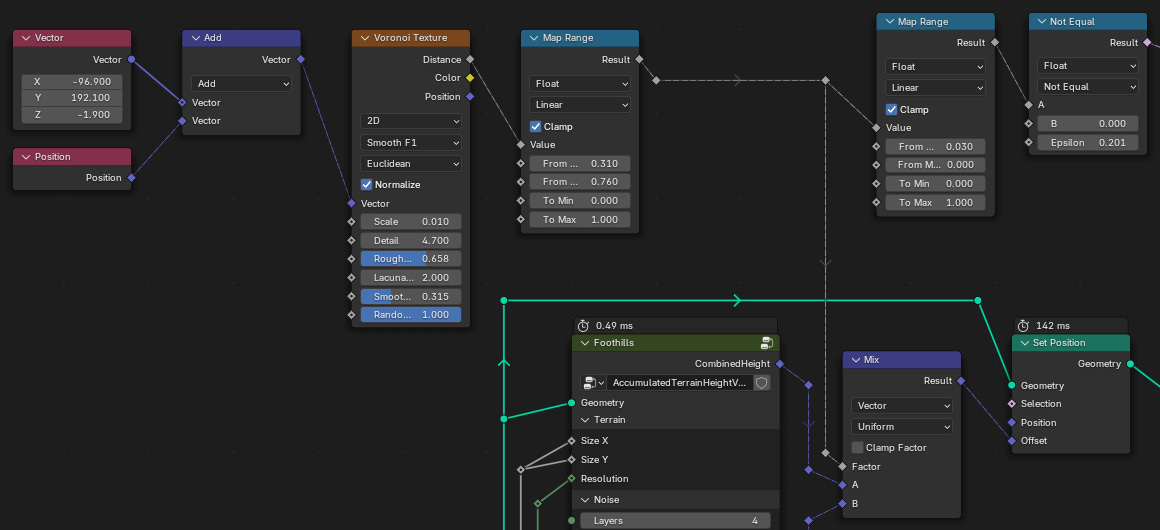
The above node graph setup utilizes two terrain noise generators (one set for mountains, and the other foothills) that are mixed together using a Voronoi texture node. We pass the same areas where the foothills terrain is prominent to a Compare node that will select the faces in which our tree placeholders will be placed. We can then adjust the density of our trees using the density field on a Distribute Points on Faces node, along with a seed value to help adjust the pattern as needed.
You could go further in this step by taking into account the face normals of the terrain, making it so that points arne’t distributed on steep slopes. However, that’s a challenge I leave to you to explore and figure out.
Hero Assets
In games and cinematics, hero assets are the crowd-pleasing, eye-catching props and models that are always prominently displayed. We’ll be borrowing the term for the big pieces in our environments. Think rivers, roads, buildings, rubble, etc. These are the pieces that you don’t want trees spawning in or over top of. We want to make sure that the road, in this case, has a path clear of trees.
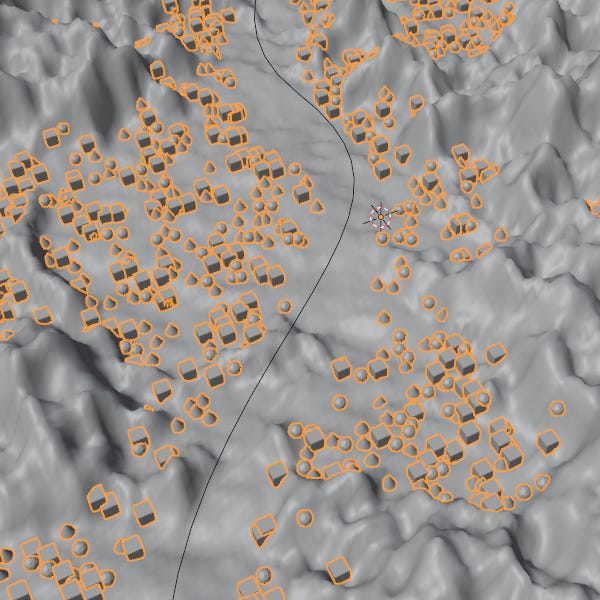
In the setup below, we use a Bezier curve to dictate the cleared path. By manually placing and adjusting the curve, we can change the path of the clearing by hand to ensure that we have the right look.
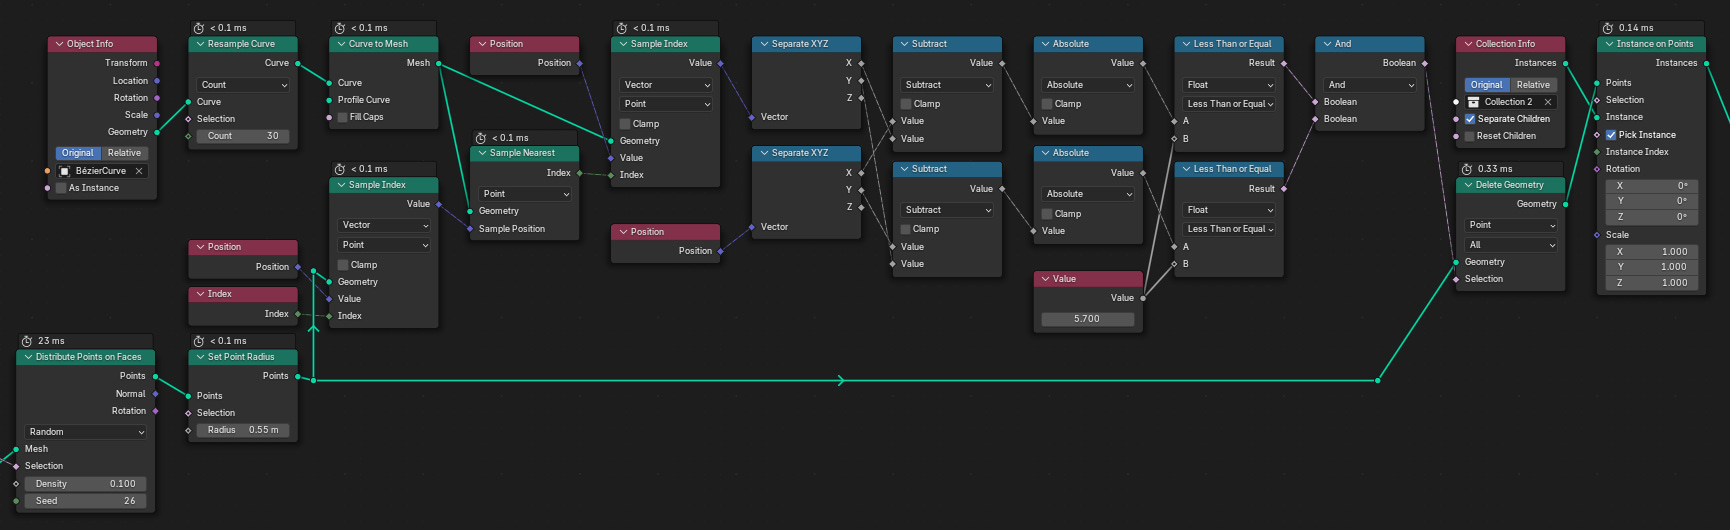
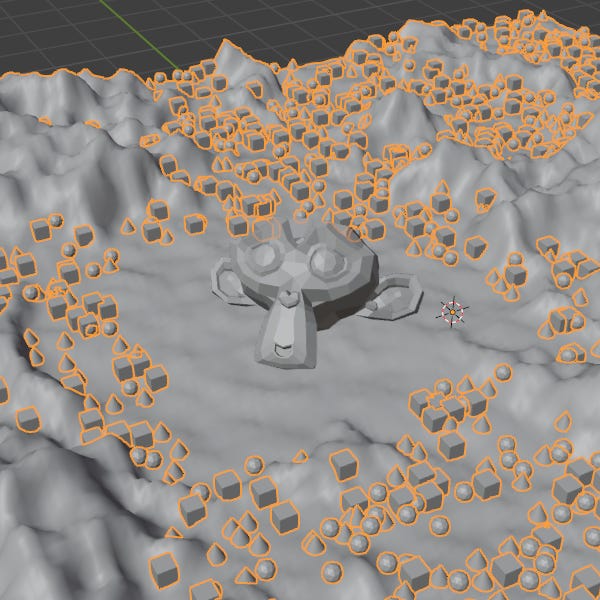
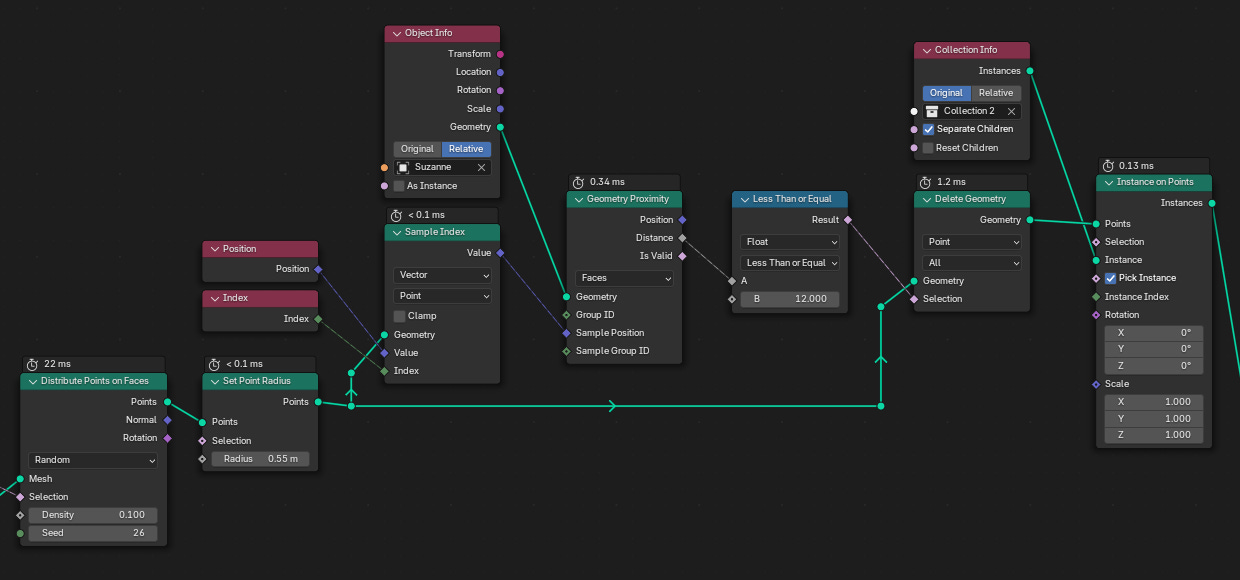
The above node setup is rather complex to account for the curve’s long length, however you can use a much simplified version of this if you have a single object or collection that is centered on one spot. By using the Geometry Proximity node, we can easily measure the distance between our distributed points and the hero asset to determine what points should be culled before we instance our trees on them
Outro
There we have it! Geometry Nodes is officially wrapped, sent off with a simple, but powerful guide for controlling the scattering of your assets. Simple, but powerful could’ve been the tagline for the past two months as that’s really what makes Geometry Nodes so amazing. Thank you for staying with me as I’ve gone through it all, and I hope you’ll stick around for my findings in Unreal Engine 5. I can promise that it’s going to be much more of the same topics, but this time with a bigger sandbox to play in.
- Adam