

Crash Course: Digital Sculpting in Blender
MipMap #041: Subdivide, Re-topologize, Subdivide, Re-topologize...


The sculpting article is here!
And Wireframe #002 is coming next week, I promise. Everything in here was supposed to be apart of it, but the article was getting a bit too long for my taste. So enjoy the practical bits stripped out and put into their own article!
Please note as well that this is a crash course, not a Blender Basics. For reasons I’ll explain next week, I’ve had to cobble together a list of resources to get me sculpting rather quickly. So if I miss an obvious detail or a key piece of the process, please let me know and I’ll be sure to work it into a proper Blender Basics article when that inevitably comes. Thanks!
From Blob to Beauty
Digital sculpting isn’t too dissimilar from the real thing. Most of the process is spent looking at an amorphous shape that sort of resembles what you wanted to make, and only after spending too much time reconsidering your life choices do you realize you’re almost there. You just need to put in a little bit more detail.
Unlike real-life sculpting though, any number of unexpected hiccups can crash the program you’re working in. Imagine if real life sculptors had to deal with their tools only working every five seconds before their sculpture and workshop disappeared around them. Ancient civilizations wouldn’t be half as interesting to go research without all of the insanely detailed old statues.
Avoiding crashes while working with millions of polygons is a bit like walking on a tightrope. Sway a little bit to one side and you don’t have enough detail to work with, but if you go back the other way then your computer starts making scary noises. Fortunately there is a generally consistent workflow to help you avoid these situations, and even some tools that can help mitigate any issues that you encounter.
Let’s get into how to (roughly) sculpt within Blender.
All About Form
It’s not hard to get lost in the weeds when sculpting. If one section doesn’t look right then you can spend hours, if not days trying to fix it. You’ll get there in the end, but was all that time spent worth it? Probably not.
I’ve found that working with form at the forefront works the best. Start out with the “blob” and work everything slowly into place, making sure that some areas aren’t getting too much attention while others hide away. It can be a tedious process, but it helps in making consistent progress.
If you’re starting a sculpt from a base mesh, then you can just start adding the detail where you need it. However, if you’re starting from scratch, you want to go through a process that looks like:
Blockout (Blobout) → Basic Shapes → Silhouette → Sculpted Details → Texture Details

Details: Sculpt Vs Texture
A big theme that hung over my research was where to draw the line in adding fine details. The first option is to just sculpt them straight in. We’re not worrying about poly count since everything is likely to be baked down onto lower resolution topology, so we could theoretically go as finely as our computer could handle.
Alternatively, we can delegate detail to the texturing process. There is only so much detail that we’d be able to capture through image baking, so why bother with so much detail only for it to be lost? If you follow this line of thinking, then these details can easily just be applied through textures using a combination of different maps and shading effects.
Getting Creative
Finally, the last big point I’d like to mention is that not everything needs to be painstakingly hand sculpted. In a DCC as versatile as Blender, there are many ways to reach the same endpoint. In one of the resources I’ll link to below you’ll see that making feathers can just be one feather repeatedly used through a particle system to achieve the same effect that you’d find if you put in the hours to make each one by hand.
Or take one of Blender’s more recent features, the VDM brush. While Blender has a whole host of brushes that give you a great deal of control over a sculpt, why not just insert a feature directly via a brush? If you’ve already sculpted a perfectly good tooth or set of scales, converting it to a VDM brush allows you to reuse it later on. But we’ll take more about VDM brushes later on.
The point is that sculpting can seem like an unattainable mountain peak that only those who invest ten thousand hours can reach. When in reality, you don’t even need to reach the peak because making it to the first base camp gets you 80% of the way there. Work towards the needs of the project, not towards the standards of others. Being smart (and lazy) can often times beat shear determination and willpower by just being faster.
Blender Specifics
Up until now I’ve spoken rather vaguely about any actual components to use. Mostly because sculpting, like modeling and animation, is fairly DCC agnostic when it comes to the theory. Concepts apply across software boundaries because they’re art principles, not software principles. But I’d be remiss if I didn’t mention how Blender goes about implementing those principles.
Sculpting Brushes
Blender boasts a large set of different sculpting brushes that each have their unique selling point. We start off fairly simple, with the Draw brush just lifting the area it’s applied to. Draw Sharp is mostly the same, but a bit (you guessed it) sharper. As you go down the list, things get more complicated. Clay / Clay Strips, Layer, Blob, Crease, Pinch, Elastic Deform, etc.; it can get overwhelming. The best way to tackle these is to just play around with them. Most of them do what they say, but some can have very different applications than what they advertise. Oh, and each brush has it’s Shift and Control key variants that alter the way the brush works. Have fun!

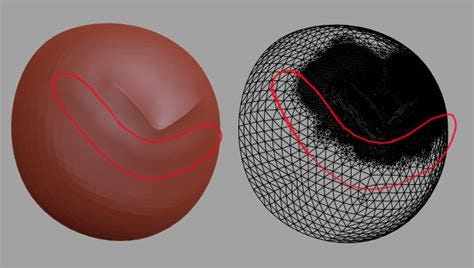
Multiresolution Modifier
Sculpting can’t happen on low resolution meshes. You need thousands, if not millions of polygons to best use the brushes that Blender provides. Fortunately for us, adding geometry is much simpler than removing geometry. The Multiresolution Modifier is the best way to go about adding resolution for us to use when sculpting as we get a fair degree of control over how our mesh is subdivided. While the Subdivision Surface Modifier also allows us to add geometry, the Multiresolution Modifier gives us control over the level of subdivision per view (Viewport vs Sculpt View vs Render), the ability to delete higher subdivisions if we already had data stored there, and a means of directly editing the base mesh rather than just the subdivided layers.
Dyntopo / Remesh
The Multiresolution Modifier adds geometry uniformly, meaning that even if we have an area where we don’t need detail, we’ll still get more geometry added. Fortunately we have two options to remedy this issue. Either we continuously adapt a given area’s geometry using Dyntopo, or we make a number of sculpts and then Remesh. Both give us finer control over the details of our mesh, but each have their individual use cases. I am not experienced enough to say which is better or worse, but I’ve linked a great explanation of the topic below.
VDM Brushes
Finally, let’s talk about custom brushes. While Blender has a set of brushes that everyone can use by default, you have the power to make your own sculpting brushes. The traditional method is by finding alpha images (black and white images) that displace the geometry in the Z direction. These work great for adding in small details where you’re more or less just adjusting the mesh you already have. However, as of Blender 3.5 you’re now able to add entirely new geometry via VDM brushes. These allow you to add fully sculpted assets as brushes. So if you made a really good ear that you want to reuse, just bake it out into a VDM and load up the brush the next time you need an ear. It is magic.

Resources
General Sculpting Workflow
Lots of Small Tips and Tricks
A Full Beginner Tutorial
Dyntopo VS Remesh
VDM Brushes
Full Game Asset Sculpt Process
Outro
And there we go! Just a brief look at digital sculpting and Blender’s capabilities with it. Next week I’ll detail the reason for the sudden change of article, along with the first proper sculpt that I’m still wrapping up. Stay tuned!
- Adam