Blender Basics: 3D Modeling
MipMap #033: Objects, Collision Meshes, and LODs
This is not a donut tutorial.
However, I do still like the donut tutorial, and I think that anyone stepping into Blender for the first time can get a lot out of following the donut tutorial.
If you don’t know what I’m talking about, my apologies, but the Blender community has been gripped by the “donut tutorial” meme for, well, almost half a decade now. Any time someone asks for help with learning Blender, it’s always a count down until someone mentions the donut tutorial.
Instead I’ll be writing about 3D Modeling as it relates to Game Development. We’ll go over the basics, move into helpful principles to keep in mind, and then finish with some resources to make the modeling process smoother.
Let’s get started.
What Is 3D Modeling?
Everything in a video game is a Game Object, and most Game Objects have Meshes; a series of Vertices linked by Edges that form Faces. Vertices are points in 3D space, Edges are the lines that connect them, and Faces are a polygon that connects 3 or more Edges. Now there is more to all of these, but we’re not concerned with those just yet. Vertices and Faces become much more important once we reach the article on Texturing, but for now we can just keep things simple.
To create a Mesh, artists will start from a base object (like a simple 6 sided cube) and then extrude, subdivide, transform, and a whole host of other operations to get to the end product. This is a Polygon Modeling workflow, named because we are directly interacting with polygons. There are other workflows that use different ways of creating Meshes, however every process generally follows the same principles: start from a base, manipulate it using tools, and work it into the desired final shape.
As we start to model, we have to ask several questions that are related to how the final object will function in our game. Is it a “hero” prop (will it be interactive or up close to the player)? What is the polygon budget for the object? Does it have to deform? What is going to be modeled versus what will be placed in the textures?
Taking a base mesh to final game object isn’t the entire process though, especially if we’re wanting to use it in a game. While getting the final shape is a key milestone in the Asset Creation Pipeline, it’s only the first. This series of articles is looking to explore that whole pipeline, so we will eventually touch on all of the aspects, but for this article we’ll only be looking at the first steps to take.
For now, let’s move on to some of the key concepts that will help us tackle some of the questions from above and help us later down the pipeline.
Key Concepts
Utilizing Reference
3D models begin and end with reference art. If you’re apart of a larger team and lucky enough to have a concept artist, you’ll be given 2D images of what the game object should look like. If you’re in a smaller team or even solo, you’ll be scrawling through Pinterest, Artstation, and DeviantArt finding artwork that hits the right “vibe” you’re going for.

How you utilize the reference art is dependent on your situation. In a team, you’ll want to stick to the images you’re given. However, the less rigid your team is, the more freedom you have. Perhaps you want to mix in elements of another piece of art you found online, or someone’s made a really great suggestion. Everything relating to reference art is, well, a reference. You use it as you need it.
Polygon Count
When making game assets, the first thing to realize is that you aren’t making a static image like you are when you’re making a film. Everything that is put into a video game is loaded into memory (RAM/vRAM) and occupies a chunk of a systems resources. And while a single vertex in 3D space takes next to nothing to load and run, it’s when a single game object has tens of thousands, even hundreds of thousands of vertices to load and store, not to mention the faces and textures that are also needed. If you get too careless, performance starts to get severely impacted. For a great example of this, you only need to look at the horrendous state some of the game objects in Cities Skylines 2 were in.
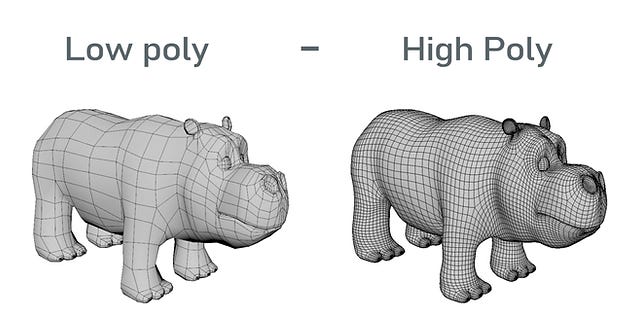
Unfortunately, there is no hard and fast rule for Polygon Counts. Everything is context dependent. A quick rule of thumb is that the more realism you want the game to be, the more intensive a game will be to run. Meaning that models will have to be higher quality (higher Polygon Counts and larger textures).

Level of Details
Following in the realm of Polygon Counts, Level of Details (LODs) are just what they say. The underlying principle is that if you’ve got a game object that’s far away from the player or camera, then it doesn’t need as much detail because it’s only occupying a small space on the screen. However, if you’ve got an object that’s going to be up close at some point but not all the time, then you don’t want to load in the resource-intensive mesh when you don’t have to.
This is where Level of Details come in, a version of the high-polygon mesh that has a much lower fidelity but retains the overall silhouette. And even to nitpick, our full fidelity base mesh with all of the detail is still a Level of Detail as well, but we give it the special name LOD 0 to signify that it’s the original.
![What is LOD? [Level of Detail in 3D Modeling] • 3D Studio What is LOD? [Level of Detail in 3D Modeling] • 3D Studio](https://substackcdn.com/image/fetch/$s_!dSSi!,w_1456,c_limit,f_auto,q_auto:good,fl_progressive:steep/https%3A%2F%2Fsubstack-post-media.s3.amazonaws.com%2Fpublic%2Fimages%2Fa0fe9e8a-b13e-44f3-9963-5fb969da0f34_1000x430.jpeg)
To cheaply and quickly create LODs for game objects, Blender has a Modifier called “Decimate” that will reduce the polygon count of a model based on a percentage or a target number of polygons to reach. Be warned though, Decimate will only respect the overall shape of the object; it doesn’t care about UV seams, topology, or deformations.
Topology
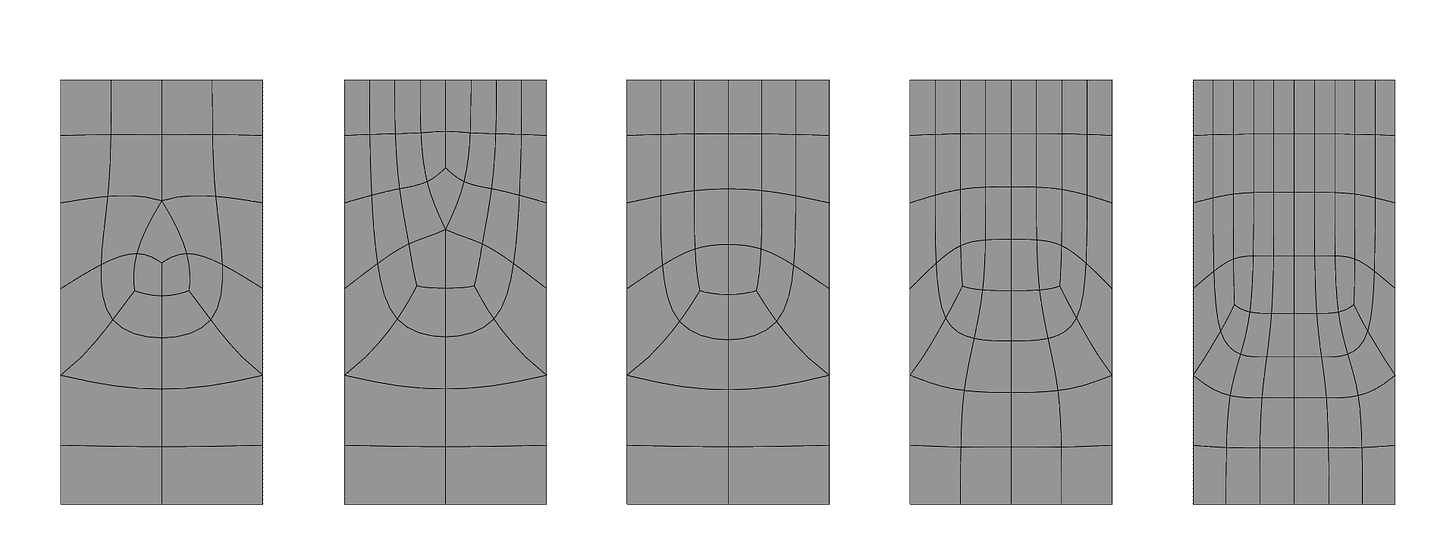
We can slide neatly from LODs to Topology; the way the faces on your mesh are laid out. Topology controls how other aspects of the pipeline, things like deformations, UV islands, and texturing, look and perform. If your Topology is good, then all the listed things will be (relatively) easy, while if you don’t put any thought into your Topology, then those processes will be headache-inducing.

Tris and Quads
This is more of an extension of Topology since Tris and Quads are the first step of having good Topology.
Remember when I said that a Face can consist of 3 or more Edges? I wasn’t wrong, but there’s a bit more to it. Tris and Quads are the types of Faces that you want to aim. When a game object gets loaded into the video game, or even just when you’re working with it in the engine editor, the game object’s mesh gets broken down into Triangles (Tris) for ease of use. And since Quads are just two Tris put end to end, those are really easy to convert to Tris. The issue is when you start making Faces with more than 4 Edges. Faces with more than 4 Edges are simply referred to as Ngons, since all geometric shapes end with a “-gon” prefix and we don’t care about specifying them.
Ngons can technically be broken down into Tris by a game engine, but they don’t always break down in the same way. If you can’t predict how the ngon will be broken down, then you can start to run into issues. Ngons also run into issues with deformations and other aspects of the pipeline, but those are unnecessary when talking about Modeling.
Detail Levels
Imagine we’re creating a busted concrete pillar, the type with the rough, exposed rebar and plenty of grooves and divots to recreate. If you are a novice, you might think that you’re going to end up with a super high polygon count in order to capture all of that detail you need. Obviously we don’t want to invest millions of polygons into a concrete pillar, but how else do we achieve the amount of detail we want?
We delegate the details to different levels on the mesh. Break down the object goal into it’s large-medium-small details. The pillar has an overall silhouette (a large elongated rectangle), the general form (large chunks taken out of it), and the micro detail (the individual bumps and grooves of the exposed concrete and rebar).
A simple long rectangle gets us our silhouette. Then we can take out the chunks that we want to give it the “fuzzy" shape we want to end up with. Finally we can either sculpt the individual grooves and divots and bake it down (more on this process in the Texturing article) or find a PBR material that already has all of those grooves and divots in the texture rather than the mesh. All while keeping our polygon count relatively low and our performance as best as possible.
Collision Meshes
Finally, we may want to consider creating our own Collision Meshes. In video games, if we want the player character to get hit or to interact with something (like not falling through the ground), we need a way to tell whether the game object is actually interacting or not.

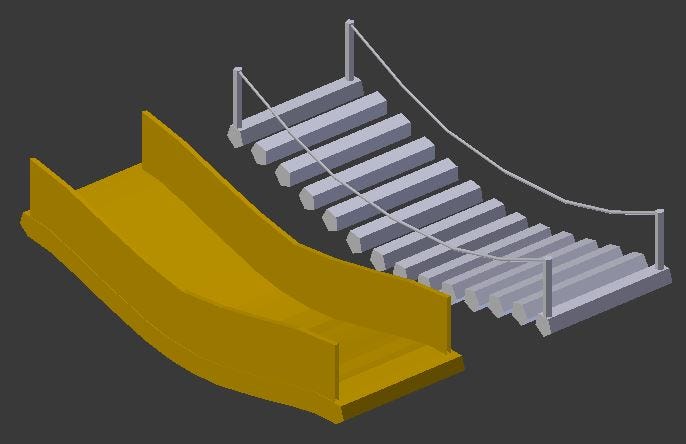
Game engines will often provide basic Collision Meshs for developers to quickly use, however these are normally very basic shapes, like a cube, a cylinder, or a pill-shaped object. These aren’t complex shapes though, and might not be what you need. In the same vein as using LODs for saving resources, you’ll want to create a very basic representation of your Game Object for the game engine to use as a Collision Mesh. Make sure it’s not full of holes or has any wild geometry, as that will severely impact performance.
Resources & Tutorials
The Donut Tutorial
Basic Blender Modeling Tools
The Modeling Process
Game Asset Modeling Overview
Outro
Of course there is so much more to learn about 3D Modeling, especially within Blender. This articles was just to give a brief overview of the components to keep in mind alongside some incremental steps to take when you start. Maybe once I’ve finished the Basics series of articles I’ll dive one step deeper to tackle specific subcategories like Hard Surface Modeling, Character Modeling, Procedural Modeling, etc. Like I said, 3D Modeling is a very broad field.
Stay tuned for next week when we continue our Blender Basics by looking at the often neglected role of Texturing.
Until then, stay modeling!
- Adam


